

Live streaming has turned into a practical tool for sharing ideas, teaching skills, running events, and building communities. It works for a solo expert talking to a small audience, and it scales to thousands of viewers when done right. The problem is that many people jump straight into cameras, apps, and settings without understanding how to set up a live stream in a way that actually serves their goal. Gear comes first, purpose comes later, and the result often feels chaotic or unreliable.
This guide is written for people who want clarity before complexity. It’s useful for first-time streamers who feel overwhelmed by technical advice. It also helps small teams that need a dependable setup without hiring a broadcast crew. Creators, educators, nonprofits, and organizations will find examples that reflect real situations rather than studio-level productions.
What follows is a grounded, step-by-step view of live streaming. No buzzwords. No unnecessary theory. Just clear decisions, practical explanations, and realistic expectations that help you build a stream people want to watch and trust.
The Basic Flow of Setting Up a Live Stream
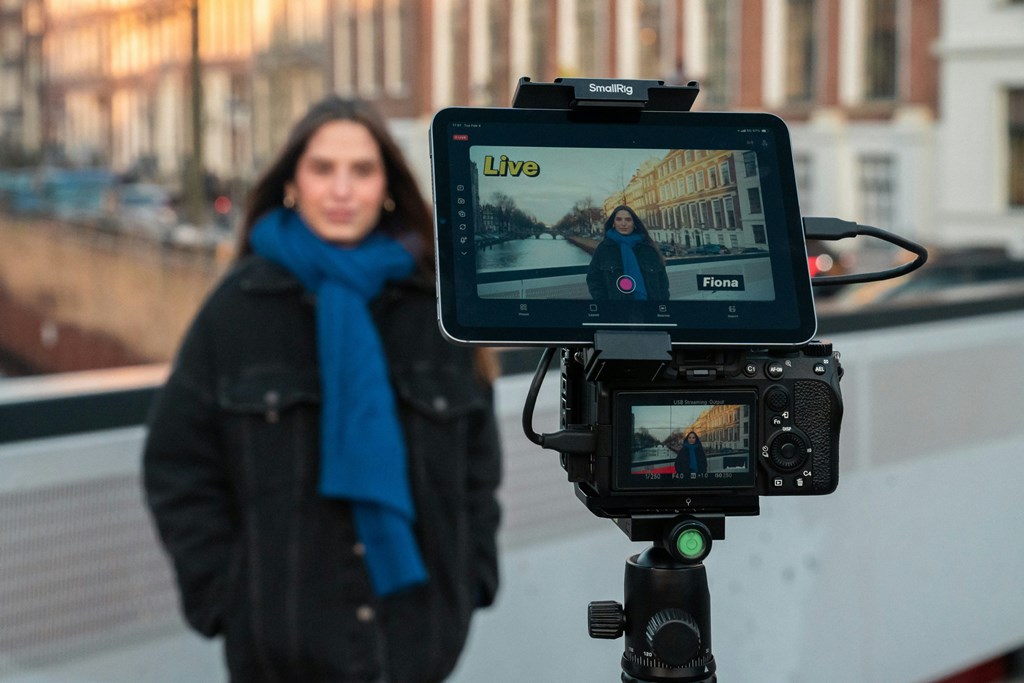
Any reliable broadcast follows a simple logic, even if the tools look complex. Understanding this flow makes how to set up a live stream far less intimidating and prevents mistakes that are hard to fix later. The process always starts with intent. A public Q&A, a paid workshop, and an internal company update all demand different technical choices. Once the goal is clear, hardware comes next. This usually means choosing a camera such as a Logitech Brio webcam, a Sony ZV-E10 mirrorless camera, or even a modern smartphone, paired with a microphone like the Blue Yeti or a Rode Lavalier.
Software connects that hardware to your audience. Tools such as OBS Studio, Streamlabs, or vMix handle encoding, scenes, and audio levels. After that comes testing. Private streams, short recordings, and playback checks on mobile devices reveal issues you won’t notice while live. Delivery is the final step, where the stream reaches viewers through a website or custom player.
The full flow looks like this:
- define the purpose of the stream
- select and configure hardware
- set up streaming software
- test the entire signal chain
- deliver the stream to viewers
Skipping steps creates technical debt. Poor audio settings or rushed software choices often resurface later as unstable streams, lost viewers, and extra costs. This structure sets the foundation for the seven tips that follow.
Tip 1 — Define the Goal of Your Stream Before Touching Any Gear
Every live stream begins with intent, even if people rarely stop to define it. The purpose of the broadcast determines almost every technical decision that follows. This is where many beginners lose clarity. They start buying cameras or installing software without knowing what the stream is supposed to achieve. When you understand how to set up a live stream properly, you start with the outcome, not the tools.
Different goals naturally lead to different setups. A public broadcast, such as a product announcement or charity event, focuses on stable delivery and clean visuals. An interactive session like a workshop or coaching call needs low delay, readable chat, and a moderator. A monetized event adds payment access, gated entry, and recording protection. A private stream, including webcam-based or adult-oriented formats, places priority on privacy controls, secure access, and reliable one-to-one performance. Each scenario pushes the technology in a different direction.
Problems appear when goals and setups don’t match. A common example is using a one-way broadcast setup for an interactive Q&A. Viewers type questions, but the delay makes conversation feel broken. Another case is trying to monetize a stream that was never designed for controlled access. Payment works, but links leak, replays get shared, and trust erodes. These issues are not caused by bad hardware. They come from skipping the planning stage.
How Goals Affect Format, Latency, and Interaction
Format defines how people experience the stream. One-way streams work well for lectures and announcements. Two-way streams demand tighter timing and stronger moderation. Chat, Q&A tools, and even emoji reactions all require human oversight. Latency tolerance is simple to explain. If viewers expect interaction, delays should stay under a few seconds. If they only watch, longer delays rarely matter.
Turning a Goal into Technical Requirements
Once the goal is clear, it becomes easier to translate it into requirements. Estimate audience size realistically. Decide who can access the stream and how. Plan whether recordings will be reused or locked away. This mindset turns how to do streaming into a controlled process rather than trial and error. With a defined goal, every technical choice starts to make sense.
Tip 2 — Choose Hardware That Fits Your Scenario

One of the fastest ways to waste money in live streaming is copying someone else’s setup without understanding why it works for them. A popular creator’s studio often looks impressive, but it’s usually built for a very specific environment and workflow. When beginners try to replicate it blindly, they end up with gear that’s underused, poorly configured, or simply wrong for their needs. Learning how to set up a live stream starts with matching hardware to real conditions, not screenshots from social media.
Hardware choices always depend on three factors: where you stream, how long you stream, and what your audience expects. A quiet home office, a shared workspace, and a public venue all impose different limits. A 20-minute update stream doesn’t stress equipment the same way a three-hour live show does. Audience expectations also matter. Viewers may forgive average video, but they rarely tolerate bad sound or unstable delivery.
Cameras, Microphones, and Lighting That Make a Real Difference
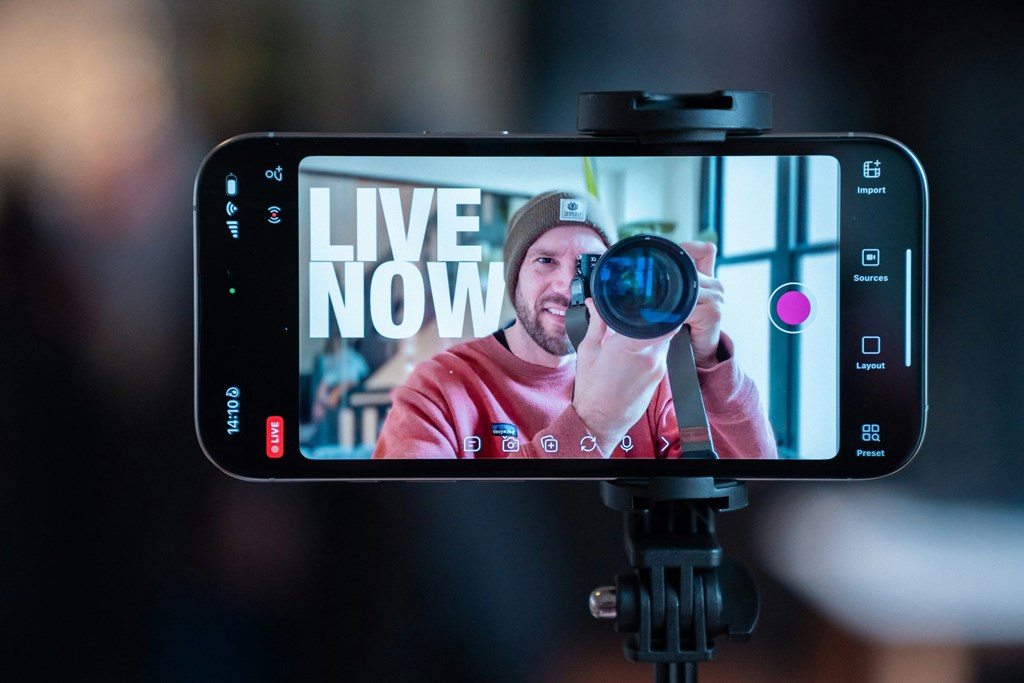
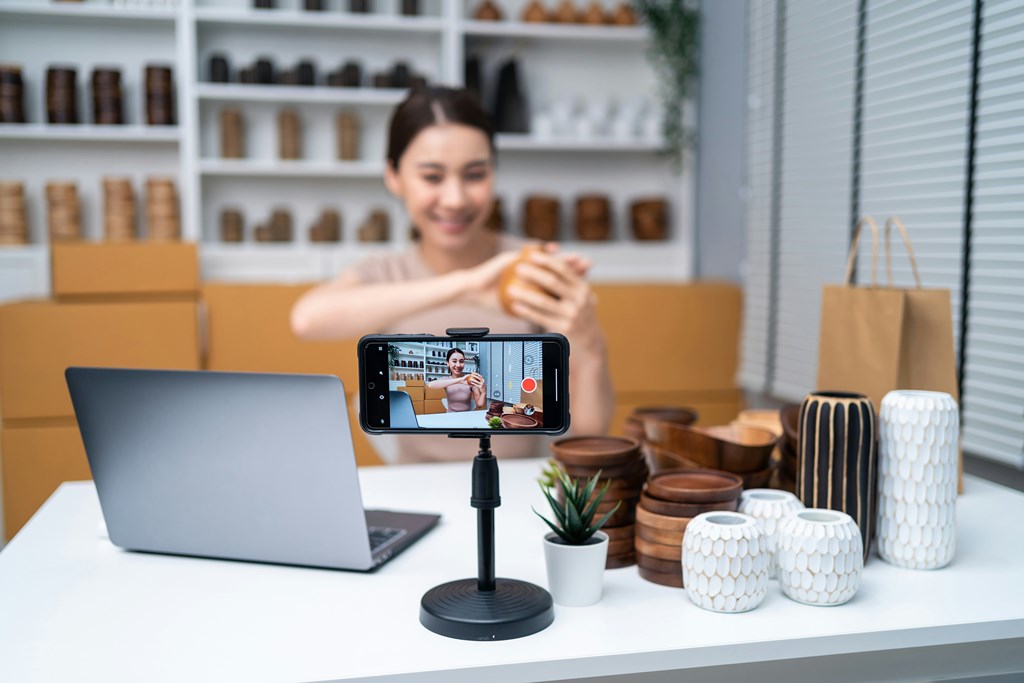
Camera selection should follow clarity, not price. Modern webcams like the Logitech Brio or Elgato Facecam are often enough for talking-head streams and webinars. For higher visual quality, mirrorless cameras such as the Sony ZV-E10 or Canon EOS R50 offer better depth and low-light performance, but they require capture cards like the Elgato Cam Link. Smartphones with good cameras can also work when mounted properly and connected via apps that turn them into webcams.
Audio deserves more attention than video. A basic USB microphone such as the Blue Yeti or Elgato Wave:3 already improves sound dramatically compared to built-in mics. Lavalier microphones like the Rode SmartLav+ are useful for movement-heavy streams. For advanced setups, XLR microphones paired with audio interfaces provide cleaner control, but they add complexity. If viewers struggle to hear you, no camera upgrade will fix that.
Lighting doesn’t need to look like a film set. A simple key light placed at a slight angle, such as a ring light or softbox, removes harsh shadows. Consistent light matters more than brightness. Mixing daylight and warm bulbs often creates uneven colors, so it’s better to stick to one light source type.
Internet Connection, Stability, and Backup Planning
A stable connection supports everything else. Upload speed is the key metric, not download speed. For a 1080p stream, a consistent 4–6 Mbps upload is usually required, with extra headroom for safety. Wired Ethernet connections outperform Wi-Fi in reliability, especially during long broadcasts.
Planning for failure is part of how to set up streaming correctly. Redundancy doesn’t have to be expensive. A mobile hotspot can serve as a backup network. Keeping spare cables, a second microphone, or an alternate camera nearby reduces panic when something fails. Viewers rarely notice preparation, but they immediately notice when a stream collapses mid-session.
When hardware fits the scenario, the setup feels calm instead of fragile. That confidence carries through the entire broadcast.
Tip 3 — Streaming Software: Control Beats Popularity
Streaming software is the technical bridge between your hardware and your viewers. It captures video and audio, compresses the signal, and sends it to a server that distributes the stream further. Many beginners assume that choosing a popular app solves everything. In reality, stability and control matter far more than brand recognition when learning how to set up a live stream.
At its core, streaming software performs several key functions at the same time:
- It captures video from webcams, mirrorless cameras via capture cards, or screen sources, while keeping audio in sync across all inputs.
- It encodes raw video into a compressed stream that can travel over the internet without overwhelming your connection.
- It sends that stream to a server using RTMP, which is the standard protocol most live streaming systems rely on.
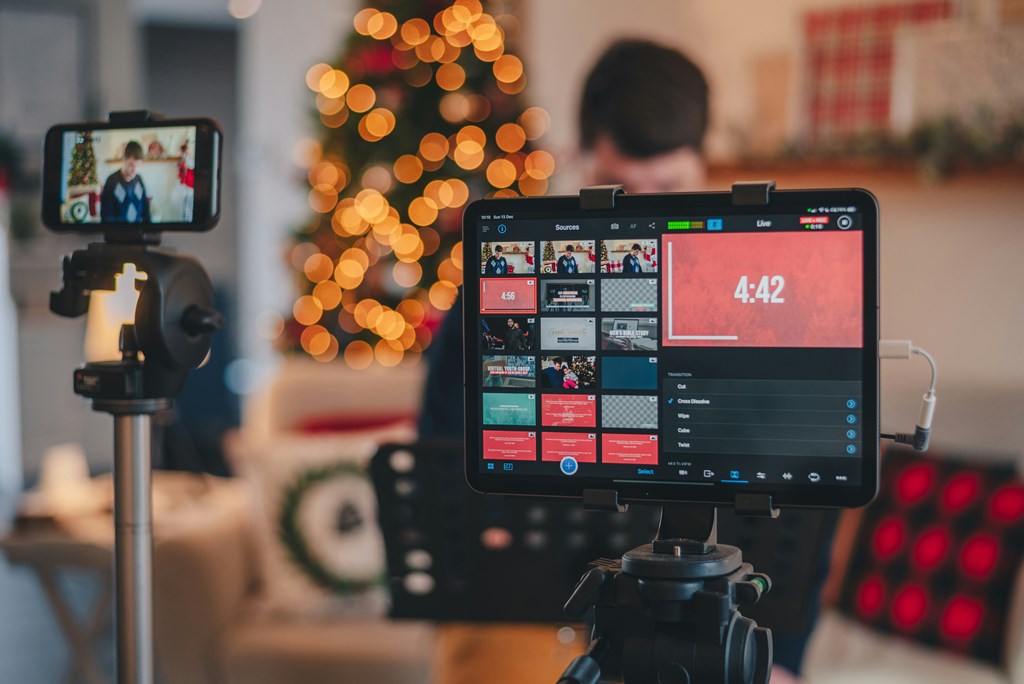
- It manages scenes, transitions, and overlays, allowing you to switch between camera views, screen shares, or media files without stopping the broadcast.
RTMP deserves a simple explanation here. When you press “Go Live” in OBS Studio or vMix, the software doesn’t send video directly to viewers. It sends the stream through an RTMP connection to a streaming server. From there, the video is processed and delivered to the audience. This is why stream keys, server URLs, and output settings exist in every streaming app. They define where your stream goes and how it gets there.
Default settings often cause problems at this stage. Many tools ship with presets that assume fast internet and powerful hardware. These presets push resolution or bitrate too high, leading to dropped frames, audio desync, or sudden disconnects once viewers join. Beginners often blame their camera or microphone, while the real issue sits inside the software configuration.
Encoding, Bitrate, and Resolution Without the Buzzwords
Encoding is the process of shrinking video data so it can be streamed live. Software encoders use your CPU, while hardware encoders rely on your GPU. On laptops or mid-range desktops, GPU encoding usually produces more stable results.
Bitrate controls how much data you send per second. For example, a 1080p stream at 30 frames per second usually performs well around 4,000–4,500 kbps. Higher values require stronger upload speeds. Resolution works the same way. A clean 720p stream often looks better than unstable 1080p. Frame rate matters most for motion-heavy content. For most talking or presentation formats, 30 fps is enough.
Matching Software Complexity to Your Experience Level
Different software fits different stages of experience:
- Streamlabs simplifies the workflow by combining alerts, chat, and basic layouts into one interface, which helps beginners focus on content while learning how to setup a stream.
- OBS Studio offers deeper control over bitrate, audio routing, and RTMP output settings, making it a common choice once quality and reliability become priorities.
- Professional tools like vMix or Wirecast support multiple camera inputs, instant replays, and advanced switching, which suits event streaming and production-heavy formats.
Simple tools work when the format stays predictable. As soon as stability, interaction, or monetization matter, control becomes essential. Streaming software is not just an app you open. It is the engine that determines whether your broadcast feels reliable or fragile.
Tip 4 — Set Video and Audio Parameters Manually
Automatic settings look convenient, but they are one of the main reasons live streams fail in subtle ways. “Auto” usually means the software guesses based on ideal conditions, not on what your internet connection or hardware can actually sustain. When bandwidth fluctuates or CPU load spikes, the stream starts dropping frames, audio drifts out of sync, or viewers see constant buffering. These problems rarely appear on the streamer’s screen. They show up on the viewer’s side, where the experience quietly degrades.
From the audience perspective, bad settings translate into very concrete issues. Video freezes while audio keeps playing. Voices sound robotic during peaks. The picture suddenly switches quality mid-sentence. None of this feels dramatic to the person broadcasting, yet it signals unreliability to viewers. If you want to understand how to stream video properly, manual control is not an advanced trick. It is basic hygiene.
Before touching detailed values, it helps to think in terms of trade-offs rather than “best quality.” Higher resolution increases bandwidth demand. Higher frame rate increases processing load. Encoding method affects system stability. Manual settings let you balance these factors instead of letting the software decide blindly.
Practical Video and Audio Settings That Actually Hold Up
Video settings should be chosen conservatively and tested under load. For most talking-head streams, 720p at 30 frames per second delivers a clean image with far fewer risks than unstable 1080p. If you move to 1080p, the upload speed must be consistent, not theoretical. CPU encoding can look slightly sharper on powerful machines, but GPU encoding is usually more stable on mid-range systems and laptops.
Audio configuration deserves equal attention. Viewers will forgive average video long before they tolerate broken sound. USB microphones typically perform well at 128–160 kbps for spoken content. Sample rates should stay consistent across devices, usually 44.1 kHz or 48 kHz. Mixing different rates often causes clicks or drift. Monitoring audio with headphones during test streams helps catch distortion early, especially when switching scenes or adding background media.
To keep decisions practical, this table shows common combinations that work reliably for most setups:
| Streaming Quality | Upload Speed Needed | Typical Use Case |
| 720p / 30 fps | 2.5–4 Mbps | Webinars, coaching, private streams |
| 1080p / 30 fps | 4–6 Mbps | Public events, product demos |
| 1080p / 60 fps | 6–9 Mbps | Gaming, motion-heavy content |
Higher resolutions deserve a reality check. 4K streaming sounds appealing on paper, but it multiplies bandwidth and processing demands quickly. A stable 4K stream at 30 frames per second often requires 15–25 Mbps of consistent upload speed, strong GPU encoding, and viewers with capable devices. For most business streams, webinars, and private sessions, that level of quality brings little visible benefit. Compression and player scaling usually erase the difference on laptops and phones. 4K becomes practical in narrow cases such as large-scale events, premium broadcasts, or archival recordings meant for later editing rather than live consumption.
This is why many professional setups still stream at 1080p while recording locally in 4K. Viewers get stability. Creators keep high-resolution footage for reuse. Treating 4K as a strategic option rather than a default setting keeps the stream reliable and prevents unnecessary failures.
Tip 5 — Test the Stream Like a Viewer, Not an Operator
Most streaming problems aren’t technical in a strict sense. They’re perceptual. Creators tend to monitor their stream from the control side, watching meters, scene buttons, and preview windows. Everything looks fine there. Viewers experience something very different. They watch on phones, tablets, or laptops. They notice delays, jumps in volume, awkward overlays, and moments where nothing seems to happen. This gap in perspective explains why so many streams feel “off” despite solid equipment.
Testing only as an operator hides these issues. A proper test forces you to step into the viewer’s role. That shift often reveals problems that would otherwise go live unnoticed. If you want to understand how to stream a video reliably, you need to see and hear exactly what your audience sees and hears.
Before going live, several checks should always happen, even for short streams:
- Audio sync should be checked with speech and movement, not silence. Say a sentence, clap once, and watch the replay to see if sound and motion align naturally.
- Mobile playback matters more than many expect. Open the stream on a phone using cellular data to see how it behaves outside your local network.
- Chat delay affects interaction rhythm. Send a message and measure how long it takes to appear on screen and get a response.
- Overlays and graphics should be reviewed at full screen. What looks subtle in preview can block faces or text for viewers.
Additional checks
Testing isn’t a one-time task. Dry runs create confidence and reduce stress. A simple workflow works well for most setups:
- Run a private or unlisted stream using the same settings planned for the live session.
- Record short segments instead of full-length tests to save time and focus on problem spots.
- Watch the recording without multitasking, as if you were a viewer who doesn’t know the script.
- Make one change at a time, then test again to understand cause and effect.
This iterative approach feels slower than jumping straight into a broadcast. In practice, it saves hours of troubleshooting later and protects your credibility. Streams that feel smooth usually aren’t lucky. They’re tested from the audience’s point of view.
Tip 6 — Avoid Common Live Streaming Mistakes
Most live streaming mistakes are predictable because they come from pressure, not ignorance. People rush setups, trust default settings, or assume viewers won’t notice small issues. In reality, audiences are quick to sense when something feels unstable. Even if the content is strong, technical friction breaks trust. Learning how to set up a live stream properly means understanding where things usually go wrong and fixing them before they repeat.
Problems tend to fall into two categories. Some are technical and immediately visible. Others are human and procedural, slowly draining engagement. Both matter equally, especially once viewers invest time into watching.
Technical Errors That Break Trust Fast
Technical issues often appear within the first minutes of a broadcast. Common examples include:
- Audio imbalance, where background music overpowers speech or voices clip during louder moments, making long listening uncomfortable.
- Frame drops caused by pushing resolution or bitrate higher than the connection can sustain, leading to stutter and sudden quality drops.
- Network instability, especially on Wi-Fi, where short interruptions disconnect the stream entirely.
- Overloaded layouts filled with alerts, banners, and windows that distract from the actual content.
These mistakes usually come from skipping testing or misunderstanding limits. They are avoidable with conservative settings and basic preparation.
Human and Process Mistakes That Hurt Engagement
Other failures are less obvious but just as damaging:
- No moderation, allowing chat spam or unanswered questions to pile up and kill interaction.
- Ignoring viewers while focusing only on slides or talking points, which makes live content feel pre-recorded.
- Starting late without explanation, creating frustration before the stream even begins.
- Poor pacing, where long monologues push viewers to leave quietly.
Here is a typical case: a streaming fails on the first channel with audio problems and a lack of moderation. Then a new channel improves by optimizing layout and providing moderation and timing adjustments. But this happens only when content creators understand that streaming for beginners is not about talent but about self-discipline.
Understanding how to set up a live stream means anticipating mistakes, not reacting to them live.
Tip 7 — Plan for Growth and Ownership from Day One
A live stream may begin small, and it may be very manageable. However, as it grows in size and scale, it will no longer be bound by the same rules. If it attracts many viewers, things that were running smoothly will no longer work very well. Chat activity accelerates, payments need clearer structure, and moderation becomes essential rather than optional. These shifts affect both the technical setup and the business logic behind it. Thinking ahead helps you avoid rebuilding everything later, which is why understanding how to set up a live stream should include long-term ownership from the beginning.
Monetization grows more complex as viewers move from casual support to paid access. Simple donation tools rarely handle subscriptions, ticketed streams, or private sessions well. Branding also becomes a limitation. Fixed layouts and platform-controlled players restrict how the stream looks, which weakens brand identity as the project grows. Data ownership is another quiet issue. Viewer behavior, payment history, and engagement metrics often sit outside your control, making optimization harder over time.
Growth usually exposes these limits all at once:
- Feature ceilings appear when you need gated access, custom monetization flows, or integrations that prebuilt tools were never designed to support.
- Vendor lock-in becomes a risk when pricing models, policies, or technical restrictions change without notice, forcing uncomfortable compromises.
- Custom logic is impossible to add when the system controls how streaming, payments, and user data interact.
Creating a Custom Live Streaming Solution with Scrile Stream
At a certain stage, live streaming stops being just a feature and starts becoming part of how a business operates. This usually happens when streams are no longer occasional experiments but recurring events tied to revenue, access control, or community engagement. Standard tools work well at the beginning, but they often struggle once reliability, ownership, and scalability become priorities. This is where Scrile Stream steps in.
Scrile Stream is not a ready-made streaming platform and not a marketplace. It is a custom development service that designs and builds live streaming solutions from scratch, based on specific business requirements. Instead of adapting your workflow to someone else’s product, the technical system is built around your use case. That approach matters when deciding how to set up a live stream that remains stable and predictable as it grows.
Custom streaming infrastructure is especially relevant for projects that need more than basic broadcasting. This includes creators running private or paid streams, educators offering recurring live sessions, event organizers selling access to live content, and businesses where live video is tightly connected to monetization. In these cases, control over delivery, access rules, and data becomes more important than convenience.
How Scrile Stream Builds and Scales Live Streaming Infrastructure
Scrile Stream focuses on the technical backbone rather than surface features. One of the key elements is server-side control. Instead of sending video directly to a third-party platform, streams can be routed to a VPS, or Virtual Private Server. A VPS is a dedicated server environment reserved for a single project. It receives the live video stream via RTMP, processes it, applies access rules, and prepares it for distribution. This setup allows full control over who can watch, how streams are protected, and how they integrate with user accounts or payment systems.
To ensure stable delivery, Scrile Stream also incorporates a CDN, or Content Delivery Network. A CDN distributes the stream through multiple servers located in different regions. Viewers connect to the nearest server instead of a single central point. This reduces buffering, smooths playback, and allows the stream to handle sudden spikes in audience size without collapsing.
In practice, Scrile Stream typically builds systems that include:
- Custom streaming architecture, where ingest methods, server logic, and access control are tailored to the format, whether it’s public broadcasts, private sessions, or one-to-one streams.
- Reliable delivery through CDN-backed distribution, ensuring consistent playback quality for viewers regardless of location or device.
- Integrated monetization mechanisms, such as subscriptions, pay-per-view access, private sessions, or tipping, built directly into the streaming flow.
- Scalability planned from the beginning, so adding new streams, users, or features doesn’t require rebuilding the system later.
Real-world scenarios show why this matters. A private coaching service needs secure session-based streaming. A paid event requires controlled access and predictable delivery. A creator-driven project needs video, chat, and payments to work together without friction. In all these cases, the core challenge is how to set up a live stream that behaves like a dependable product rather than a temporary setup.
Conclusion
Live streaming improves through practice, not perfection. Every test, adjustment, and small failure builds confidence and removes uncertainty from the process. When you focus on iteration, streams become easier to manage and more reliable over time. Long-term thinking shifts attention from quick fixes to stability, ownership, and scalability.
As live video becomes part of a business or product, technical shortcuts start to limit growth. At that stage, custom infrastructure often makes more sense than patching together tools. If you’re planning a serious streaming project and want to understand how to set up a live stream with reliability and control in mind, explore Scrile Stream solutions and contact the Scrile Stream team to discuss a custom approach built around your needs.
FAQ
How do I create a live stream?
Creating a live stream starts with a clear goal and a simple setup. You choose your camera and microphone, connect them to streaming software, configure basic video and audio settings, and send the stream to viewers through a player or website. Testing privately before going live helps catch issues early and keeps the broadcast predictable.
What is the basic setup for live streaming?
The basic setup always includes three elements working together. Hardware covers the camera, microphone, and lighting. Software handles encoding, scenes, and stream control. A stable internet connection with enough upload speed ties everything together. This combination matches the practical guidance outlined in Tips 2 through 4.
How do I host my own stream?
Hosting your own stream means controlling where the video goes and how viewers access it. Streaming software sends video via RTMP to a VPS, which processes the stream. A CDN then distributes it to viewers from nearby servers, improving stability and scale. This approach aligns with custom solutions built by Scrile Stream.