
A basic streaming setup isn’t some mystery reserved for pros with flashy gear and tech studios. At its core, it’s just a combination of the right tools and a clear signal — and getting started is easier than most people think. Whether you’re looking to go live for work, a hobby, or your own small business, the barrier to entry is far lower than it was just a few years ago.
Today, anyone with a decent internet connection and a few essential devices can stream live video. You don’t need to spend thousands. A laptop, a webcam, a USB mic, and free software can take you surprisingly far — and the path from beginner to polished presenter is much more gradual than people assume.
In this guide, we’ll explore what you really need to start streaming, what’s worth upgrading, how to avoid common mistakes, and how to build your own streaming platform when you’re ready.
What Do You Need to Start Streaming?
So, what do you need to start streaming if you’re brand new to the space? The answer is simpler than you might expect. A basic streaming setup isn’t about chasing the best gear — it’s about having just enough to go live with confidence and clarity.
At the foundation of any stream are five essential components. Here’s a quick look:
- A stable internet connection — Upload speed is more important than download. Aim for at least 5 Mbps for 720p, and 10 Mbps or higher if you’re targeting 1080p. If your stream constantly buffers or drops, no gear upgrade can fix that.
- A streaming device — This could be a laptop, desktop, or even a smartphone. Laptops are a great middle ground for flexibility and power. If you’re using a phone, tripod mounts and external mics can help a lot.
- A camera — Most laptops come with built-in webcams, and phones have surprisingly good front cameras. That’s more than enough to start. Later on, you can explore USB webcams or DSLR options.
- An audio source — Your built-in mic works in a pinch, but audio is the first thing people will notice if it’s bad. Even a basic USB microphone can dramatically improve sound clarity.
- Streaming software — Tools like OBS Studio or Streamlabs Desktop let you connect your video and audio sources to your streaming destination (e.g., YouTube, Twitch, your own site). Some platforms also offer browser-based options that don’t require installation.
The Software Side: Streaming Tools for Beginners
Once you’ve got your camera, your mic, and your connection, the next piece is software. This is where your stream actually comes together. Video, audio, screen share, overlays — all of it gets handled here. Your streamer setup doesn’t exist without it.
The most common pick? OBS Studio. It’s free, open source, and once you’ve figured it out, you can use it for pretty much anything. Gamers, coaches, teachers, streamers — everyone uses OBS at some point. It’s flexible, reliable, and surprisingly light on your system if you don’t overload it with scenes and sources.
If you want something that looks a little less like an aircraft dashboard, Streamlabs is the softer landing. It’s built on OBS but adds a friendlier interface, some templates, and plug-and-play features. Perfect if you just want to hit “go live” and see yourself on screen.
Then there are the native tools: YouTube Live, Facebook Live, Twitch Studio. These are browser-based or app-based and handle most of the technical work behind the scenes. If you’re only doing casual broadcasts or don’t care about overlays and transitions, they’ll get the job done. No install, no headaches.
At the core, all of these tools work by acting as an encoder. They take your camera and microphone input, compress it into a format that won’t choke your bandwidth, and send it to a streaming destination. That’s where your audience watches.
A few setup tips: set your bitrate between 2,500 to 4,500 kbps for 720p or 1080p. Choose 720p if you’re on a slower line — it’s a safe default. Always do a test run before your first stream. Check audio levels, resolution, lighting, frame drops. It’s easier to fix something offline than to flounder in front of real people.
You don’t need to buy everything on day one. Start with what you have, test the waters, and gradually improve your basic streaming setup as your goals evolve. Most beginners discover that small upgrades — like better lighting or cleaner audio — go much further than expensive cameras.
Leveling Up: Better Gear for Better Streams
Once you’ve gone live a few times and started feeling the rhythm, the weak spots in your basic streaming setup will show themselves. Your video might look flat. The audio could sound like you’re speaking from inside a tunnel. And sometimes, the whole scene just feels off — even when everything technically works.
That’s where upgrades come in. You don’t have to go full studio mode — you just need to level up what actually matters. These aren’t luxury add-ons. They’re practical boosts that directly improve how your stream feels to a viewer. A clearer picture. Cleaner sound. Less noise. Better control.
Here’s how to move from beginner gear to a solid entry-level setup without wasting money on things that look cool but don’t help.
Upgrading Your Video Setup
Your camera tells people where to look. If it’s fuzzy, dim, or awkwardly framed, everything else takes a hit. A good image doesn’t need to be cinematic — just clean and stable.
Start with these webcam options:
- Logitech C920: the classic 1080p webcam. Plug it in and it works. Sharp, decent colors, and it just holds up.
- Razer Kiyo: similar sharpness, with a built-in ring light that actually helps if you don’t want to buy extra lighting right away.
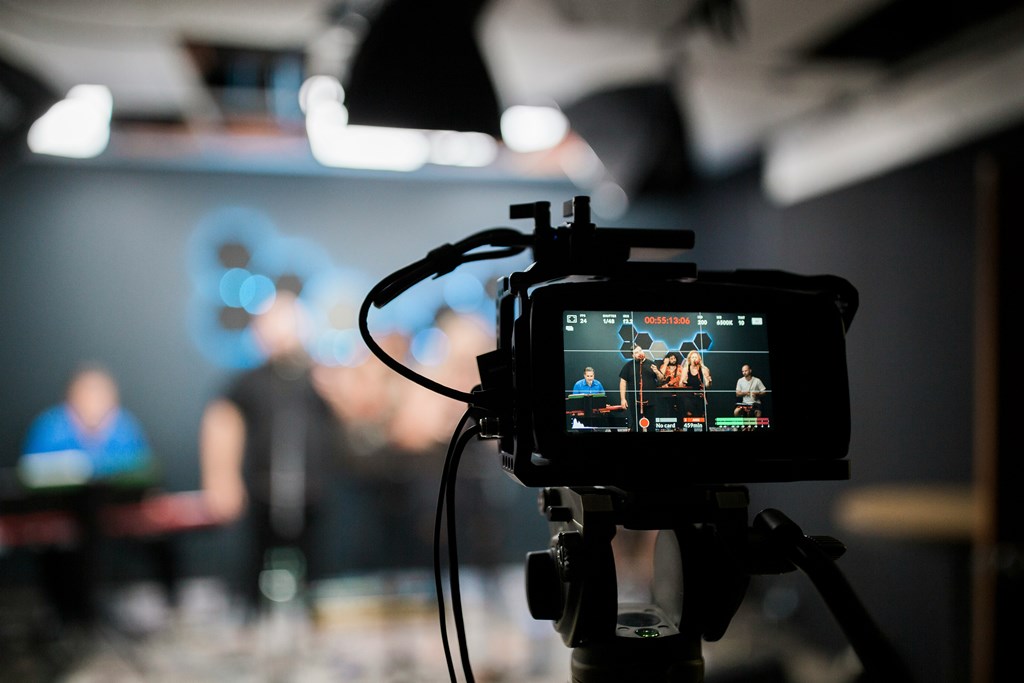
If you’re ready for a sharper image and more depth of field, step up to a DSLR or mirrorless camera. Canon, Sony, Panasonic — most brands have affordable models that work great for video. Just make sure they support “clean HDMI output.” You’ll also need a capture card (like an Elgato Cam Link) to get that camera signal into your computer.
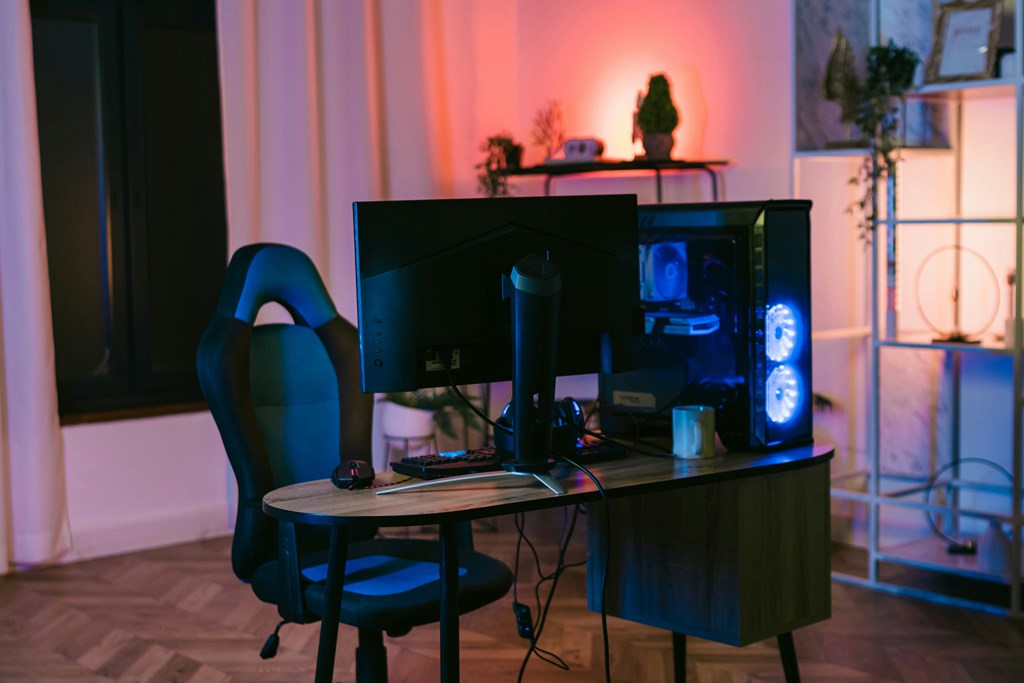
Now fix your lighting. That’s often more important than the camera. Use a ring light, an LED panel, or even a desk lamp bounced off the wall. Window light works too — just don’t backlight yourself.
Clean your background. Curtains, solid walls, bookshelves, fake plants. Or throw up a green screen if you want to replace the background digitally. Messy bedrooms kill the vibe faster than a dropped frame.
Making Your Audio Actually Sound Good
Bad audio ruins good content. It doesn’t matter how nice your camera is — if your voice is buried under background noise or echo, people tune out fast.
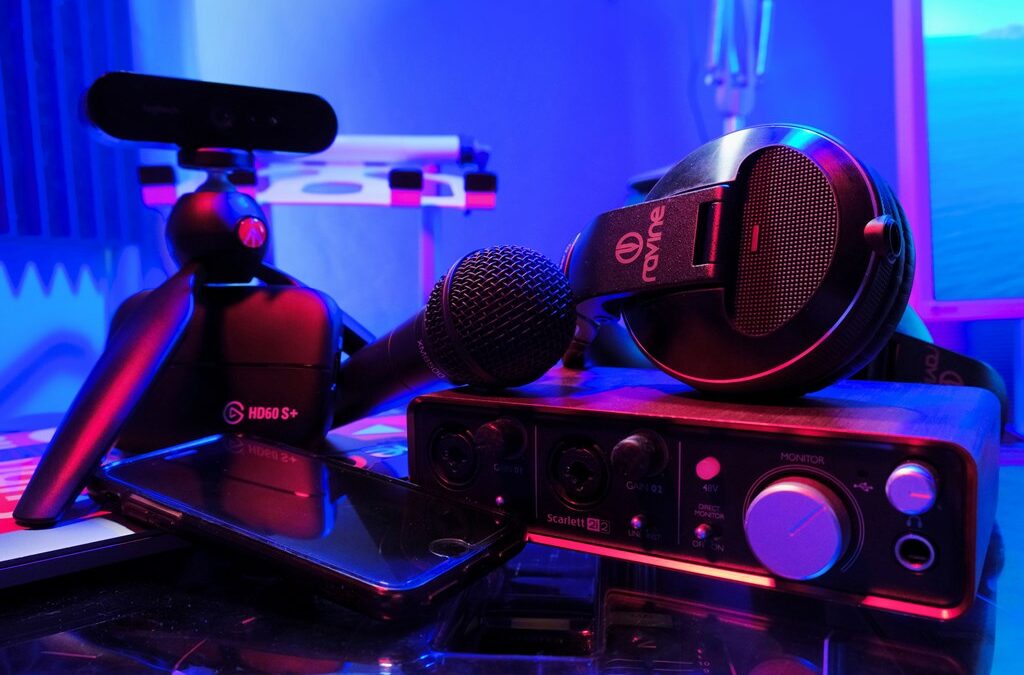
The simplest fix is grabbing a USB microphone. Models like the Blue Yeti or Samson Q2U are popular for a reason: they plug straight into your computer, deliver clean sound, and don’t need extra gear. If you’re recording in a quiet room, even an entry-level USB mic will sound 10x better than what’s built into your laptop.
Want more control? Step up to a condenser mic with an XLR connection, paired with an audio interface (Focusrite Scarlett, for example). This combo opens the door to gain adjustment, EQ, and real monitoring.
Beyond the mic, it’s the little tools that clean up your sound:
- Pop filter: stops harsh “P” and “S” sounds.
- Boom arm: frees up desk space and gets the mic closer to your mouth.
- Acoustic treatment: soft surfaces reduce echo. If you’re not buying foam panels, hang up a blanket or move closer to curtains.
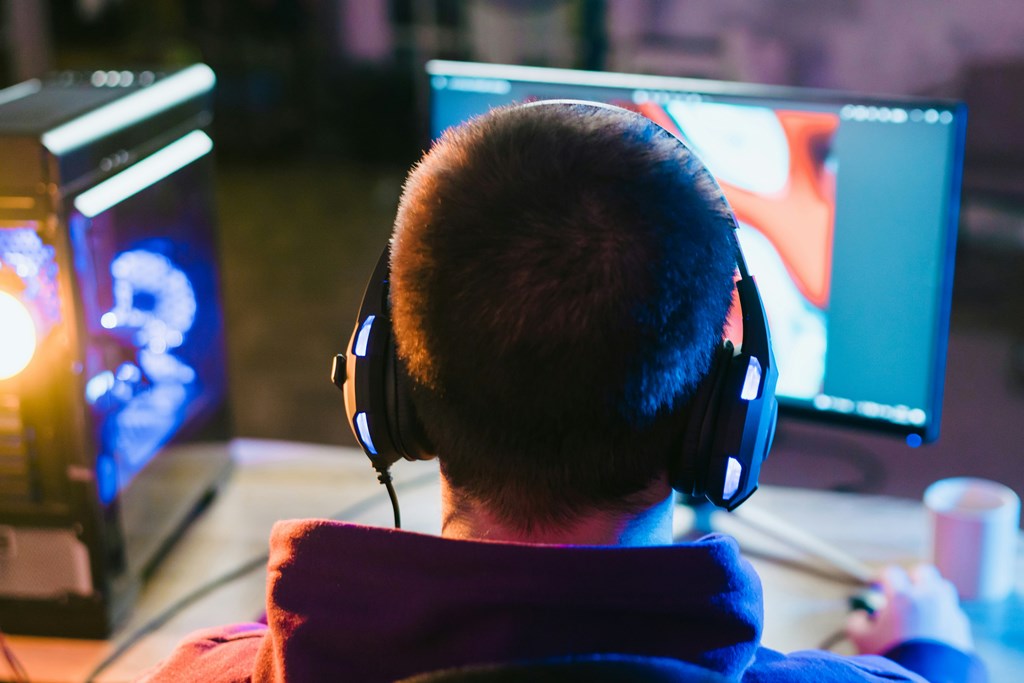
Headphones are non-negotiable. They keep your mic from picking up feedback and help you catch problems early. Earbuds are fine. Over-ears are better. Just don’t stream blind to your own sound.
Useful Extras That Make a Difference
This is where your streaming set up goes from functional to comfortable. Small changes here make your workflow smoother and reduce distractions while you’re live.
If you’re streaming from a console, you’ll need a capture card. Look at Elgato HD60 X or AverMedia Live Gamer Portable — both send HDMI signals from your console to your computer, letting you add overlays, scenes, and webcam feeds through OBS or Streamlabs.
Support gear matters more than people expect:
- A tripod keeps your camera steady and framing consistent.
- Desk mounts give your mic or lights proper placement without eating up space.
- Cable organizers stop your setup from looking like a tech yard sale.
If you’re managing chat, overlays, or switching scenes on the fly, a second monitor helps a lot. Even an old screen will do. You could also set up a teleprompter if you’re running scripted content — coaching, training, or lectures.
These aren’t essentials, but they keep you focused. When your gear stays where it should and your scene looks tidy, you spend less time fixing problems and more time creating content with confidence.
Example Streaming Setups Compared
There’s no single path to going live. Your gear depends on what you’re streaming, where you’re doing it from, and how polished you want it to look. Here’s a quick side-by-side to help you decide what fits your needs. If you’re figuring out your streaming setup for beginners, start with the basics — then level up when it makes sense.
| Setup Name | Camera | Mic | Software | Internet Speed | Estimated Cost |
| Bare Minimum | Built-in | Built-in | Mobile App | 5 Mbps | $0–$50 |
| Balanced Beginner | 1080p Webcam | USB Mic | OBS Studio | 10 Mbps | $150–$250 |
| Quality Starter Rig | DSLR + Capture Card | Condenser Mic | OBS + Add-ons | 15+ Mbps | $500+ |
Streaming Setup Tips for a Smooth First Stream
First streams are where everything that seemed fine suddenly falls apart. Lag, echo, weird angles, dropped frames — the usual suspects. Avoiding these issues doesn’t take much. You just need to prepare. Here’s what you need to stream without stress, especially when using your first real gear.
Run a proper internet test. Go to speedtest.net or fast.com. Look at your upload speed — that’s the number that matters. If it’s under 5 Mbps, consider switching to wired Ethernet or upgrading your plan.
Open OBS or your streaming app and do a test recording. Check your bitrate (aim for 2,500–4,500 kbps for 720p or 1080p) and frame rate (30 fps is standard). Don’t wait until you’re live to find out your setup can’t handle the load.
Now fix what your viewers will actually see. Light your face. Even one lamp in front of you can help. Clean up your background — or at least close the closet door. Avoid bright windows behind you unless you want to look like a silhouette.
Check your framing. Too much ceiling? Head chopped off? Sit up, adjust the webcam, and make sure your eyes sit around the upper third of the screen. That’s the natural place people look.
Use headphones, even cheap ones. They stop feedback loops and echo from ruining your audio.
And finally, don’t overlook small mistakes. A mic placed too far, a camera pointed up your nose, Wi-Fi drops — all of them kill the vibe. These are the real streaming essentials most people learn the hard way. You don’t have to.
Why Upgrade Matters — But Only When You’re Ready
You don’t need to start big. In fact, upgrading too early is one of the fastest ways to waste money. A basic streaming setup can carry you a long way if you use it well. But eventually, you’ll hit limits — not technical ones, but ones your audience starts to notice.
People will forgive blurry video. They won’t forgive bad sound. If your mic picks up keyboard clicks, room echo, or sounds like it’s recording from the next room, your stream will empty out fast. Clean, balanced audio keeps people listening. A better camera is nice, but it’s rarely the thing that makes them stay.
When you’re ready to improve, follow this order:
- Upgrade your microphone — it makes the biggest difference.
- Improve your lighting — better light makes even cheap cameras look great.
- Step up your camera, if needed.
- Add accessories — things that make streaming easier, not just fancier.
Here are 3 signs it’s time to upgrade your gear:
- You’re consistently getting feedback about low audio quality or fuzzy video.
- You’re streaming regularly and want to polish your brand.
- You’re spending more time fighting your setup than focusing on your content.
Keep your upgrades intentional. Fix real pain points. Let quality grow with your confidence.
Build Your Own Streaming Platform with Scrile Stream

Once you’ve figured out your basic streaming setup and you’re no longer just testing the waters, it might be time to think beyond YouTube or Twitch. That’s where Scrile Stream comes in — not a platform you join, but a development service that builds your own.
Scrile Stream helps creators, educators, and businesses launch fully branded streaming websites. It’s built for people who don’t want to stream under someone else’s rules. You get an embedded streaming player, private or public access controls, monetization features, and full control over your content and design.
You’re not locked into a one-size-fits-all template. Everything is customizable — interface, features, payments, branding, permissions.
Scrile Stream is perfect for:
- Online coaching and paid 1-on-1 consulting.
- Educational content with restricted student access.
- Adult streaming websites with tip-based earnings.
- Private performances or members-only livestreams.
- Events and workshops where you control the pricing, access, and format.
Unlike public platforms, Scrile Stream gives you ownership over everything: your audience, your data, your revenue. No middlemen, no algorithm guessing, no sudden takedowns. Just your stream, on your terms.
If you’ve already put time into building your streaming presence and want to scale it into a serious business, Scrile Stream gives you the tools to do it right. You’ve got the setup — now you can build the platform that matches it.
Conclusion
A basic streaming setup is more than enough to get started. You don’t need pro gear or a studio — just a few smart choices and a willingness to go live. Start small, focus on clarity and sound, and let consistency do the rest.
As your content grows, so will your needs. That’s when it makes sense to invest, upgrade, and maybe even build something that’s fully yours.
If you’re ready to take that next step, Scrile Stream can help you launch your own branded streaming platform. Reach out to the Scrile team and explore what they can build for you.
FAQ
What is the easiest stream setup?
The simplest way to stream is with a smartphone and a steady internet connection. Modern phones already have decent cameras and microphones, so you can open an app like YouTube, TikTok, or Instagram and go live without installing extra tools or buying gear.
How do I set up a basic stream?
Connect your camera and microphone, open your streaming software, and select both as inputs. Grab your stream key from the platform you plan to broadcast on, paste it into the encoder, choose your bitrate and resolution, check audio levels, and press “Start Streaming.” A short test run helps catch problems early.
What equipment do you need to start streaming?
You need a computer or smartphone, a camera, a microphone, and an internet connection with enough upload speed to send your video in real time. This small kit is enough for a clean and stable first stream.
I appreciated the formatting — easy to skim and still informative.